The Oro Business Application Platform (or OroBAP) is the new framework from OroCRM. OroBAP is the programming framework they’re using to build their new CRM application, as well as the framework we all hope will bring some modernity to the crufty world of business software programming.
What’s that? You don’t trust some wonky custom framework that reinvents every wheel? There’s nothing to worry about on that front. OroBAP is based on the Symfony 2 framework. If you know Symfony, you already know 80% of OroBAP and can start building applications immediately. If you don’t know Symfony, then get ready to join a thriving community that’s been a leader in professional PHP application programming since 2005.
Today we’re going to develop a Hello World program in Symfony. We’ve cover creating a new Symfony bundle, as well as the basics of Symfony’s MVC dispatch. We’ll be working with the OroCRM application, (vs. an empty platform application). If you’re having trouble installing OroCRM, the OroCRM forums are a great place to ask for help.
At the end of this article you’ll have a simple Symfony hello world bundle. For the impatient (or curious), we’ve prepared a completed bundle. No peeking in the back of the book until you’ve tried yourself.
Important: The following article refers to alpha, pre-release software. While the general concepts should apply to the final version, the specific details are almost certain to change.
Creating the Bundle
If Magento/Zend Framework development is oriented around modules, then Oro/Symfony development is oriented around Bundles. Bundles contain all the PHP, configuration, and frontend files needed to implement a particular piece of functionality. Every OroBAP project should start with the creation of a new bundle.
Similar to Magento modules, every bundle has a vendor namespace, and a bundle name. For this tutorial, we’re going to use the vendor namespace Pulsestorm, and a bundle name of HelloworldBundle. Bundle names need to end in the word Bundle. Symfony uses this convention to programmatically identify them. It’s a useful convention for humans as well.
We’ll create our bundle in the default Symfony src folder. Don’t worry right now about whether your code belongs in the main src folder or in a vendor folder, it’s easy enough to move your code later. This is one of the advantages of grouping everything together in a bundle.
To create your first bundle, simply create the following file at the following location
#File: src/Pulsestorm/Bundle/HelloworldBundle/PulsestormHelloworldBundle.php
<?php
namespace Pulsestorm\Bundle\HelloworldBundle;

use Symfony\Component\HttpKernel\Bundle\Bundle;

class PulsestormHelloworldBundle extends Bundle
{
}
There’s a lot going on up there, so let’s break it down. The naming convention for the bundle path is as follows
src/[Vendor Namespace]/Bundle/[Bundle Name]/[Full Bundle Name].php
As previously discussed, we’ll be using Pulsestorm as our vendor namespace, so that’s
src/Pulsestorm/Bundle
The Bundle folder is here because we’re creating a bundle. This convention allows all your bundles to be located together. You can see this in practice in the OroCRM core. If you take a look in the vendor/oro/crm/src/OroCRM/Bundle/ folder
$ ls -lh vendor/oro/crm/src/OroCRM/Bundle/
total 0
drwxrwxrwx  14 alanstorm  staff   476B Jun 18 20:10 AccountBundle
drwxrwxrwx  14 alanstorm  staff   476B May 28 11:59 ContactBundle
drwxrwxrwx   6 alanstorm  staff   204B May 28 11:59 DashboardBundle
you’ll see the three Bundle that make up the OroCRM application.
You’ll recall we mentioned our bundle name would be HelloworldBundle, so that gives us the path of
src/Pulsestorm/Bundle/HelloworldBundle/
Finally, the PHP file name is the full bundle name. The full bundle name is a combination of the vendor namespace and the bundle name. In our case that’s Pulsestorm combined with HelloworldBundle to give us a full bundle name of PulsestormHelloworldBundle. This, in turn, gives us a final path of
src/Pulsestorm/Bundle/HelloworldBundle/PulsestormHelloworldBundle.php
Next, we’ll look at the class definition itself.
Anatomy of a Bundle Class
Let’s take a look at the class file definition again
namespace Pulsestorm\Bundle\HelloworldBundle;

use Symfony\Component\HttpKernel\Bundle\Bundle;

class PulsestormHelloworldBundle extends Bundle
{
}
A bundle’s class name should be the same as its full bundle name, so that’s PulsestormHelloworldBundle. Well, actually, the full class name is
Pulsestorm\Bundle\HelloworldBundle\PulsestormHelloworldBundle
That’s because Symfony (and therefore OroBAP) makes heavy use of PHP namespaces, and our bundle class lives in the Pulsestorm\Bundle\HelloworldBundle namespace thanks to this line.
namespace Pulsestorm\Bundle\HelloworldBundle;
You’ll notice the PHP namespace for this class matches the file path. That’s no coincidence — Symfony’s autoloader uses the full class name to find the class file. We’ll talk more about this later, so just keep it under your hat for now.
Our bundle’s class should extend from the base Symfony bundle class. If you look at the class definition, it looks like that’s the class Bundle.
class PulsestormHelloworldBundle extends Bundle
{
}
However, that’s actually the full Symfony class
Symfony\Component\HttpKernel\Bundle\Bundle
Again, this is due to the namespace. We imported this class as “Bundle” with the following line.
use Symfony\Component\HttpKernel\Bundle\Bundle;
Without it, we could have written an equivalent bundle class declaration with
class PulsestormHelloworldBundle extends \Symfony\Component\HttpKernel\Bundle\Bundle
{
}
It’s hard to overstate this: Symfony loves namespaces. If you’re been avoiding them because your framework of choice hasn’t embraced them, now’s the time to get up to speed.
Adding the Bundle
With the above in place, we’ve created a simple, empty bundle. If you load any page in OroCRM with the app_dev.php URL
http://oro.example.com/app_dev.php
And click on one of the profiler toolbar icons

you’ll be dropped into the Symfony profiler. If you click on the Profiler’s config tab,
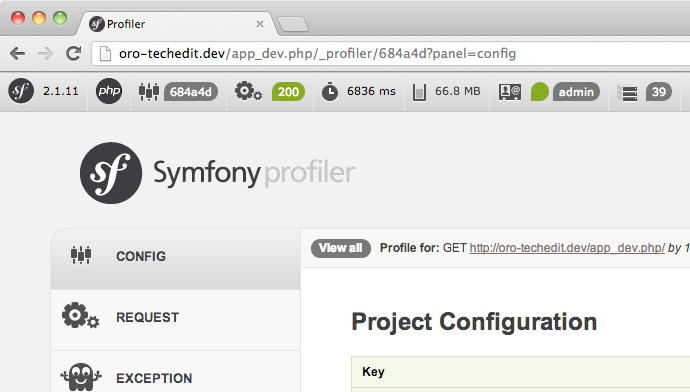
you’ll see a list of the active bundles further down the page.

We’ll be using the app_dev.php “development environment” URL for the entirety of this tutorial. Symfony’s deployment environments allow you to setup different environments for development, staging, production, or whatever else you can think of. The app_dev.php environment has a minimum of backend caching, and makes the most sense for a development tutorial. You’ll need to take extra steps (Cache clearing, bootstrap generation) to deploy your code to the prod/production environment. We’ll cover these in greater detail in a future article.
Scrolling through this list, you’ll notice our PulsestormHelloworldBundle isn’t listed. Although we’ve created this bundle, we haven’t told Symfony about it yet. To teach you how to tell Symfony about our bundle, we’ll need to take a slight diversion into Symfony’s Kernel based architecture.
The Symfony Kernel
Symfony is a component framework. In non-technical terms, this means each Symfony bundle should also be a stand-alone library that you can use in any PHP project. This is very similar to the Zend Framework philosophy.
However, unlike the Zend Framework, Symfony 2 also offers and heavily promotes their Kernel architecture as the right way to combine Symfony components into a single project. Zend Framework’s Zend_Application class serves a similar purpose, but its been poorly documented and misunderstood by many developers. (That, however, is a different article for a different time).
If you see the word Kernel you might be intimidated. Don’t be, it’s relatively simple. If you look at any of the app*.php files, you’ll see code that looks something like this
#File: web/app.php
$kernel = new AppKernel('prod', false);
$kernel->loadClassCache();

$request = Request::createFromGlobals();

$response = $kernel->handle($request);

$response->send();
$kernel->terminate($request, $response);
This code instantiates an AppKernel object, and then calls its handle method. The handle method returns a response object. The response object’s send method is called, and then we terminate the Kernel with a call to terminate. This simple, five step process is all there is to dispatching a Symfony app request. The AppKernel object is responsible for loading all the bundle objects, and (if one is present), handing the request off to the MVC component (or alternate component) for handling. The Kernel is just the smallest part of our application, and where everything starts. We’ll talk more about this in future articles.
Why do you care about this? Because it’s the AppKernel that needs to know about our bundle. To add a bundle to a Symfony application, we’ll need to edit the registerBundles method of the AppKernel class.
#File app/AppKernel.php
use Symfony\Component\HttpKernel\Kernel;
use Symfony\Component\Config\Loader\LoaderInterface;

class AppKernel extends Kernel
{
    public function registerBundles()
    {
        //...
        return $bundles;
    }
}
The registerBundles method returns a PHP array of instantiated bundle objects. If we expand the //... from above, you’ll see code like this
$bundles = array(
    new Symfony\Bundle\FrameworkBundle\FrameworkBundle(),
    new Symfony\Bundle\SecurityBundle\SecurityBundle(),
    new Symfony\Bundle\TwigBundle\TwigBundle(),
    ...
);
Here Symfony is instantiating its bundles and letting the AppKernal know about them. What we need to do is instantiate and add our bundle to the list. The best place to do this is right before the $bundle variable is returned.
public function registerBundles()
{
    //...
    $our_bundle = new Pulsestorm\Bundle\HelloworldBundle\PulsestormHelloworldBundle();
    $bundles[] = $our_bundle;
    return $bundles;
}
What we’ve done here is instantiate our bundle class (using the fully qualified name), and then added it to the $bundles array.
With this in place, we should be ready to go. Reload your app_dev.php URL (not the profiler page) and you’ll see the following in your browser window
Fatal error: Class ‘Pulsestorm\Bundle\HelloworldBundle\PulsestormHelloworldBundle’ not found in /path/to/crm-application/app/AppKernel.php on line 71
Call
Gah! An error. Looks like we’re not quite done yet.
OroCRM Autoloading
PHP is complaining that it couldn’t find the class Pulsestorm\Bundle\HelloworldBundle\PulsestormHelloworldBundle. That’s because we failed to configure Symfony’s autoloader to be aware of our new class namespace. How we should do this creates a bit of a sticky wicket. OroCRM and Symfony push the bleeding edge of PHP development. This includes using Composer to distribute the entire framework and application, and using composer’s autoload feature. At this early point, it’s not clear where the right place for third party developers to add their bundle’s namespace to the autoloader is.
All of which is a fancy preamble to, the solution below will work, but may not be the best way post OroCRM 1.0.
The autoloader is setup in the following file
#File: `app/autoloader.php`
use Doctrine\Common\Annotations\AnnotationRegistry;

$loader = require __DIR__.'/../vendor/autoload.php';

// intl
if (!function_exists('intl_get_error_code')) {
    require_once __DIR__.'/../vendor/symfony/symfony/src/Symfony/Component/Locale/Resources/stubs/functions.php';

    $loader->add('', __DIR__.'/../vendor/symfony/symfony/src/Symfony/Component/Locale/Resources/stubs');
}

// add possibility to extends doctrine unit test and use mocks
$loader->add( 'Doctrine\\Tests', __DIR__.'/../vendor/doctrine/orm/tests' );

AnnotationRegistry::registerLoader(array($loader, 'loadClass'));

return $loader;
The most important part of this file is
#File: `app/autoloader.php`
$loader = require __DIR__.'/../vendor/autoload.php';
This pulls in all the composer autoload configuration. The rest of this file handles some special cases with the Doctrine ORM. We’re going to add our own namespace as a similar special case.
To add our Bundle namespace to the autoloader, all we need to do is add the following three lines of code before the $loader is returned.
#File: `app/autoloader.php`

$prefix = 'Pulsestorm';
$folder    = realpath(dirname(__FILE__)) . '/../src';
$loader->set('Pulsestorm', $folder);

return $loader;
The $loader variable contains a Composer\Autoload\ClassLoader object. We’re calling its “set” method: This method allows us to pass in a class prefix and folder path, which tells the autoloader
If you see a class beginning with
Pulsestorm, look for it in the following folder.
In our case, the prefix is our Bundle namespace, Pulsestorm, and the folder is the src folder in the root of the Symfony application. If you’re interested in the specific logic of the autoloader, you can find them in the Composer\Autoload\ClassLoader‘s findFile method
#File: vendor/composer/ClassLoader.php
public function findFile($class)
{
    //...
    $first = $class[0];
    if (isset($this->prefixes[$first])) {
        foreach ($this->prefixes[$first] as $prefix => $dirs) {
            if (0 === strpos($class, $prefix)) {
                foreach ($dirs as $dir) {
                    if (file_exists($dir . DIRECTORY_SEPARATOR . $classPath)) {
                        return $dir . DIRECTORY_SEPARATOR . $classPath;
                    }
                }
            }
        }
    }
    //...
}
Covering this in length is beyond the scope of this article, but a few var_dumps in this method should help steer you right if you’re having trouble getting your autoloader setup.
With the above in place, reload your app_dev.php URL. The PHP error message should be gone, and if you look at the Config tab you should see the Pulsestorm bundle listed as loaded.
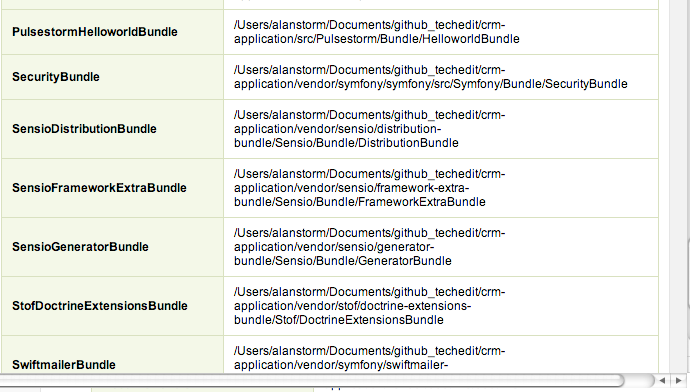
Setting up Routing
Phew! That was a lot of new mental work to get an empty bundle into the system. Next, we’re going to setup out hello world page with the following URL
http://oro.example.com/app_dev.php/hello-oro
In many MVC frameworks, this would mean creating a controller class with an action method, both named in a particular way based on the URL. Routing in Symfony is a little different, but ultimately no more complicated, and a little more flexible.
First, we’re going to create a controller file in our bundle. Create the following file with the following contents
#File: src/Pulsestorm/Bundle/HelloworldBundle/Controller/OurController.php
<?php
namespace Pulsestorm\Bundle\HelloworldBundle\Controller;

use Symfony\Bundle\FrameworkBundle\Controller\Controller;

class OurController extends Controller
{
    public function indexAction()
    {
        var_dump(__METHOD__);
        exit;
    }
}
Standard Symfony Notes: This file lives in the
Pulsestorm\Bundle\HelloworldBundle\Controller
namespace, making its real name Pulsestorm\Bundle\HelloworldBundle\Controller\OurContrller. All Symfony/Oro controllers inherit from the base Symfony\Bundle\FrameworkBundle\Controller\Controller controller. This is aliased as Controller while declaring the class, thanks to our use statement
use Symfony\Bundle\FrameworkBundle\Controller\Controller;
Other than the Symfony namespaces, this looks like a standard PHP controller file — except its name (OurController) and the action method (indexAction) have nothing to do with our URL name.
Hopefully, out next step will clear that up. Create the following file at the following location.
#File: src/Pulsestorm/Bundle/HelloworldBundle/Resources/config/routing.yml
pulsestorm_helloworld_myfirstcontroller:
    pattern:  /hello-oro
    defaults: {_controller: Pulsestorm\Bundle\HelloworldBundle\Controller\OurController::indexAction}
This is a Symfony routing configuration file. Symfony supports multiple formats for its configuration files, but most examples (like the one above) are written in YAML. YAML is a simple text format for representing simple object values. In XML, the above might look like this
<pulsestorm_helloworld_myfirstcontroller>
    <pattern>/hello-oro</pattern>
    <defaults>
        <_controller>Pulsestorm\Bundle\HelloworldBundle\Controller\OurController::indexAction</_controller>
    </defaults>
</pulsestorm_helloworld_myfirstcontroller>
Rather than forcing a specific controller naming convention on you, Symfony allows you to create a set of named routes. Each route defines a regular expression pattern to match against URLs, and a controller-object/action-method to use for that URL.
If that didn’t make sense, don’t worry, it will. Let’s take a look at our configuration line by line.
pulsestorm_helloworld_myfirstcontroller:
This defines the route’s name. Symfony never uses this name for anything other than identification purposes (i.e. it’s never used semantically), but custom and convention dictate that you prefix your route name with an underscored version of your bundle name to prevent accidentally naming it the same as another bundle’s route.
Next, we have the pattern value
pattern: /hello-oro
This is where we’re telling Symfony which URL our bundle wants to claim as its own. Since we want our URL to look like the following
# All Equivilant
http://oro.example.com/app.php/hello-oro
http://oro.example.com/app_dev.php/hello-oro
http://oro.example.com/hello-oro
we use the pattern /hello-oro. In our example this pattern is just a simple string match — more complex patterns are possible, and we’ll cover them in a later article.
Finally, we need to tell Symfony where to route our /hello-oro requests. That’s done with the defaults key.
defaults: {_controller: Pulsestorm\Bundle\HelloworldBundle\Controller\OurController::indexAction}
Here we’re telling Symfony to use the controller (_controller) class Pulsestorm\Bundle\HelloworldBundle\Controller\OurController to instantiate the controller object, and then call its indexAction method.
While a little more involved than some other frameworks, Symfony’s routing system gives you much more control over the design of your URLs. With a Symfony application, you never need to see index in a URL again!
Activating Bundle Routing
With the above in place, if you attempted to load the URL
http://oro.example.com/app_dev.php/hello-oro
you’ll still get a “No Route” page.
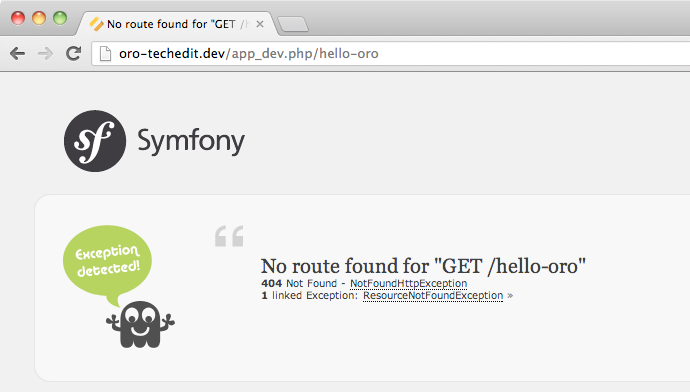
Don’t panic. Symfony’s default router doesn’t automatically parse a bundle’s routing.yml file. We need to add one more configuration section that tells Symfony’s AppKernel that our bundle contains routing information.
To do this, add the following content to the top of the following file, being careful not to edit the other file contents.
#File: app/config/routing.yml
pulsestorm_helloworld:
    resource: "@PulsestormHelloworldBundle/Resources/config/routing.yml"
    prefix:   /
Again, we’re dealing with a YAML file. The
pulsestorm_helloworld:
key is a unique identifier that has no semantic value to Symfony, other than it should be unique. Custom/convention dictates (as it often does) that this be a lower-case/underscore version of your bundle name.
Then, the resource key
resource: "@PulsestormHelloworldBundle/Resources/config/routing.yml"
tells Symfony it should load the contents of another yml routing file. The @PulsestormHelloworldBundle string is a special shortcut syntax: Symfony will expand this into the full file path of the PulsestormHelloworldBundle. By using this syntax, it means we don’t need to change our configuration if the location of our bundle changes.
Now reload the page and you should see the results of our simple controller action

OroBAP Controller Responsibilities
In an OroBAP application, the controller object action method has two responsibilities. The first is to examine the request and determine what, if any, actions need to happen in the business logic layer. Since this is a simple hello world tutorial, we don’t need to worry about this right now.
As for the second responsibility, a controller object’s action method should return a response object, and this response object will send the HTML response back to the browser. If that didn’t make sense, dont’ worry. Symfony has a bunch of framework code that will handle all this for you. Instead just think of this as
The controller needs to render a template
A line of code’s worth a thousand tutorial words, so let’s see this in action. Change your indexAction method so it looks like this
public function indexAction()
{
    $response = $this->render('OroUIBundle:Default:index.html.twig');
    return $response;
}
and then load the page. You should see something like this
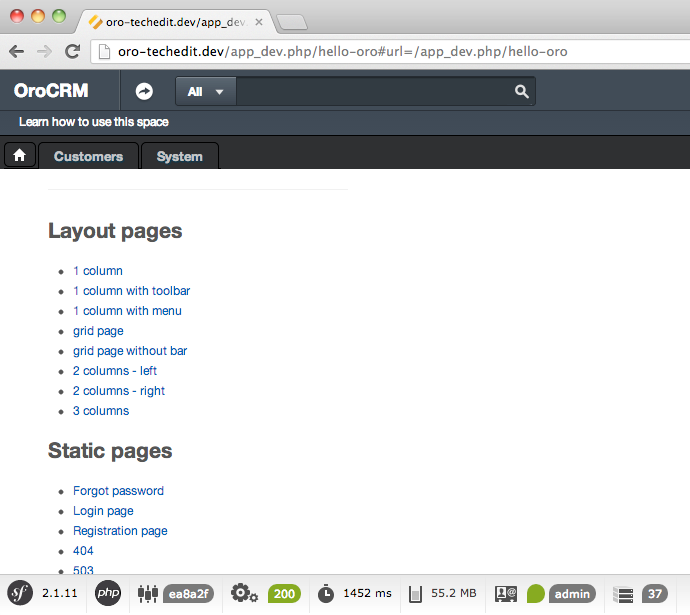
Congratulations, you just rendered your first OroBAP template.
Symfony Twig Template Rendering
The render method is part of the base Symfony framework. You pass it the identifier for a template file, it returns a response object with a rendered template.
Of course, if you’re anything like I was when I first started using Symfony, you’re probably having one of those
woah, what the heck is that weird looking
OroUIBundle:Default:index.html.twigstring?
moments. This is a template identifier, which is a specially formatted string. This specially formatted string tells Symfony where to look for a template.
The first part of the string (OroCRMAccountBundle) tells Symfony which bundle to look for the template in. In our case, this will expand to
./vendor/oro/platform/src/Oro/Bundle/UIBundle/
After the bundle name comes the path to the template, or Default:index.html.twig in our specific case. This string will be converted into a file path
`Default/index.html.twig`
Then symfony will look for the template in the aforementioned bundle’s view folder. The default Symfony view folder is
Resource/views
and that means out final template path will be
./vendor/oro/platform/src/Oro/Bundle/UIBundle/Resource/views/Default/index.html.twig
If you take a look inside this template, you’ll see the twig code that generates the HTML
#File: ./vendor/oro/platform/src/Oro/Bundle/UIBundle/Resources/views/Default/index.html.twig
{% if not oro_is_hash_navigation() %}
<!DOCTYPE html>
<html>
<head>
    {% block head %}
...
While the above template (a list of template examples) is useful, you probably want to see your OWN content in the template. To get that change the render call to
$response = $this->render('PulsestormHelloworldBundle:Default:our-template.html.twig');
And then create your template file at
#File: src/Pulsestorm/Bundle/HelloworldBundle/Resources/views/Default/our-template.html.twig
<h1>Hello Oro</h1>
Again, symfony replaces PulsestormHelloworldBundle with the full path to the bundle (src/Pulsestorm/Bundle/HelloworldBundle), then looks in the bundle’s view folder (Resources/view), and Default:our-template.html.twig is translated into Default/our-template.html.twig.
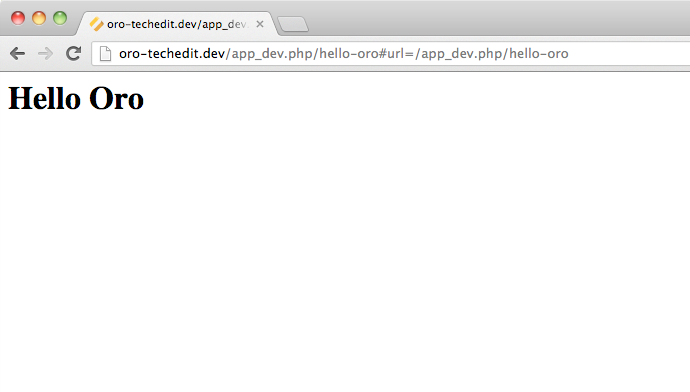
If you reload the page, you should see your Hello Oro title, in bold black Times New Roman.
Twig Template Inheritance
There’s one last topic to cover before we wrap up for today. While we were able to set our own custom Hello Oro text above, we’re missing the OroBAP site UI. Fortunately, the Oro team has made adding this via twig a breeze. Just change your template so it contains only the following line
#File: src/Pulsestorm/Bundle/HelloworldBundle/Resources/views/Default/our-template.html.twig
{% extends 'OroUIBundle:Default:index.html.twig' %}
and then reload the page. You should see a fully rendered OroBAP user interface. Twig brings the concept of class inheritance to templates. By using the twig extends statement, we’re starting our template with all the functionality and layout provided by the OroUIBundle:Default:index.html.twig template.
Of course, we’ve lost our Hello Oro message. Let’s drop it back in there
{% extends 'OroUIBundle:Default:index.html.twig' %}
<h1>Hello Oro</h1>
Reload the page and — Symfony error!
A template that extends another one cannot have a body in PulsestormHelloworldBundle:Default:our-template.html.twig at line 2.
An immediate reaction to this error might be that it doesn’t make sense. If an extended template can’t have a body what’s the point? However, if we stop and think for a second, we’ll start to see the problems with our assumption.
Where in the template should our <h1>Hello Oro</h1> be displayed? Right at the bottom of the UI? That doesn’t make any sense. Maybe twig should be smart enough to parse it out and stick it in the middle of the page? That works for our specific case, but what happens if we want content somewhere else in the template?
Fortunately, we don’t need to answer these questions. Twig has us covered. If you change our template so it matches the following
{% extends 'OroUIBundle:Default:index.html.twig' %}
{% block content %}
    <h1>Hello Oro</h1>
{% endblock %}
and reload the page,
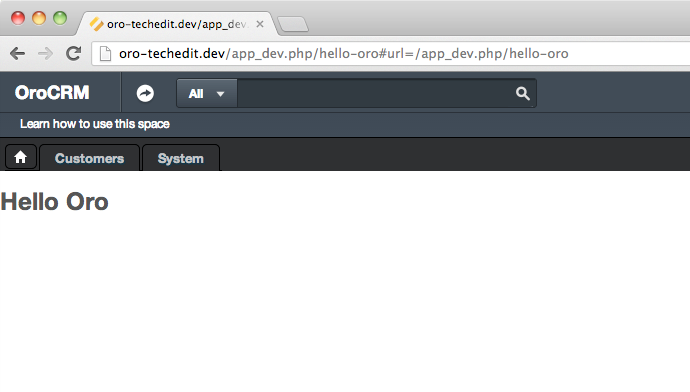
you’ll have a much better result. Our hello world message now shows up inside the OroBAP UI.
So why does this work? Twig templates allow you to define certain content areas (called blocks) and then, similar to extending a PHP class, a child template may replace their contents. By putting our HTML inside the following
{% block content %}
    ...
{% endblock %}
we’ve told twig we want to replace the content block in our parent template. If you’re curious what content areas exist for twig templates, take a look at the parent template and search for {% block. We’ve included a list below, but this is sure to change over time
{% block application_menu %}
{% block content %}
{% block hash_nav %}
{% block head %}
{% block head_script %}
{% block head_style %}
{% block header %}
{% block help %}
{% block left_panel %}
{% block logo %}
{% block main %}
{% block messages %}
{% block notifications %}
{% block page_container %}
{% block pin_bar %}
{% block pin_button %}
{% block right_panel %}
{% block script %}
{% block searchbar %}
{% block section_top_right %}
{% block shortcuts %}
{% block user_menu %}
Wrap Up
That’s enough for an intro article. Today we covered creating and activating a Symfony bundle in Oro, as well as the default bundle structure for a simple MVC request. If you’re curious about learning more, the Symfony 2 documentation is a great place to start. While you won’t get Oro specific information, Oro has hewed closely to the Symfony recommendations, which means the core framework MVC and bundle concepts are the same.
If you think this seemed like a lot of work to get a simple hello world page up, you’ll be interested in our next article exploring automation with Symfony’s console application.
